> For the complete documentation index, see [llms.txt](https://assimilate.gitbook.io/live-fx-documentation/llms.txt). Markdown versions of documentation pages are available by appending `.md` to page URLs; this page is available as [Markdown](https://assimilate.gitbook.io/live-fx-documentation/getting-started/first-time-start-up.md).
# First Time Start-Up
## General
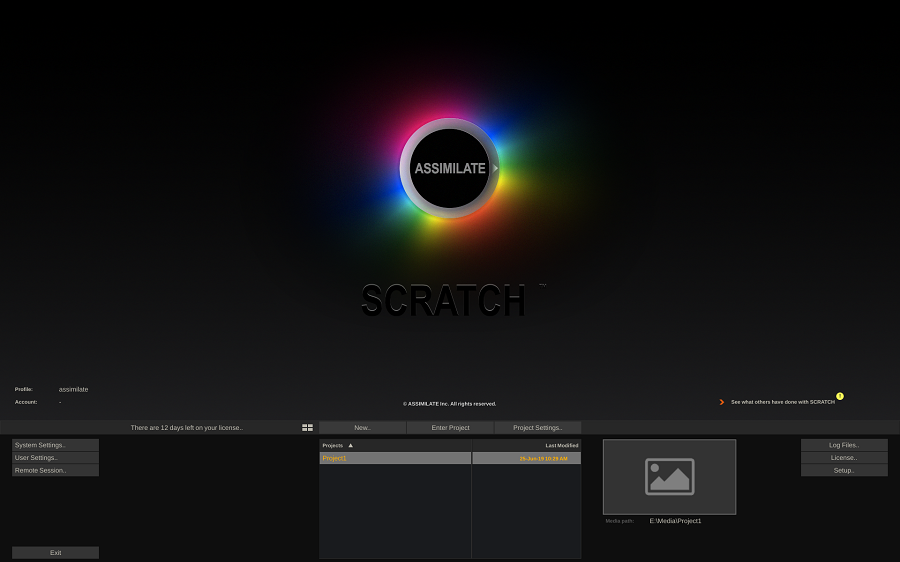
This chapter introduces you to the Start-up Screen in detail, showing you how to create and configure Projects and user profiles and manage Live FX system settings. When Live FX is launched, the Start-up Screen shows the Assimilate logo & product designation in the top part of the screen - the so-called View Port area. The top left corner will contain several links that will open a web page in your default web browser with information on the selected topic.
### **First Time Startup**
When you start Live FX the first time the Enhance Live FX dialog is shown where you can select to extend the Live FX installation and/or watch a quick tour video about Live FX.
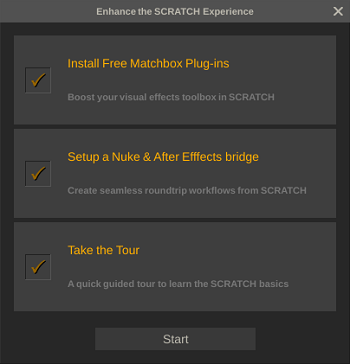
Click any of the options to select/deselect. Press **Start** to start the setup. Click the close option in the top right corner to skip the options.
* Matchbox Plug-ins. Matchbox plug-ins are (mostly free) effects plug-ins (see [https://logik-matchbook.org](https://logik-matchbook.org/)). This option will automatically download and set up all the plug-ins supported by Live FX. You can also do this manually from the System Settings menu which is discussed later in this chapter.
* Setup After Effects and Nuke bridges. Create Custom Commands functions to easily share clips between Live FX and Adobe After Effects and/or The Foundry Nuke. For more information on Custom Commands, see [Custom Commands](/live-fx-documentation/getting-started/introduction/settings/system-settings/custom-commands.md).
* Take the Tour - show a basic tutorial video of Live FX.
Note that you can also start the Enhance Live FX dialog from the Setup button in the login menu (discussed below).
### **System Info Overlay**
When you click anywhere in the View Port area, an overlay is displayed with system and software version information. This info is also available in the log files maintained by Live FX but the overlay is more readily available.
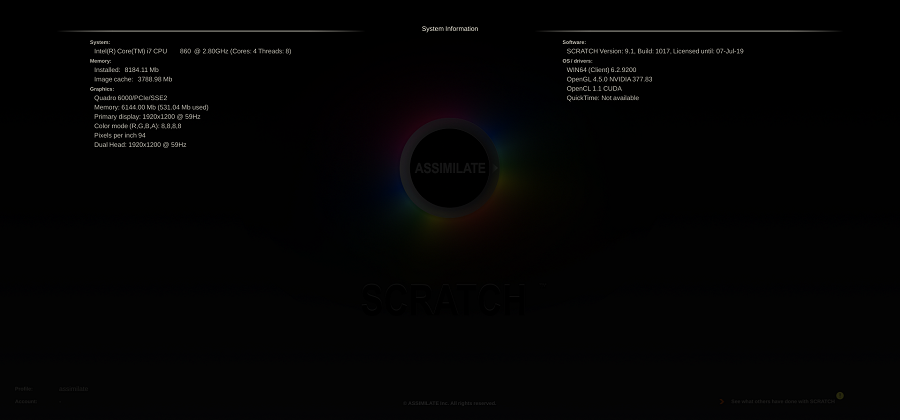
If you click anywhere on the overlay it will be lifted, leaving the normal logo view again.
### Menu Bar
Just below the View Port area, you find the Main Menu bar.
**PROJECT VIEW**
 The icon button to the left of the New button toggles the project list between a poster frame view and a project names list.
### New
Create a new project. This opens the Project Properties dialog, discussed in the next paragraph.
### **Enter Project**
The middle **Enter Project** button is available when you have created and selected a project in the Menu area below it. The first time you open Live FX this button is grayed out since there are no projects yet. Sometimes, after installing a new version of Live FX this button might be labeled **Upgrade Project**. In that case, you first need to upgrade the project database for it to work with the new version. Make sure you always maintain a backup of your project before upgrading your Live FX version or project database version. Once Live FX has upgraded a project database the normal **Enter Project** button becomes available again.
## **Project Settings**
This opens the panel to edit the settings for the current selected project. This panel is discussed in the next paragraph.
### Menu Area

### **Project List**
In the middle of the menu area is the Project list. Using the icon button on the Menu Bar you can toggle this list between a poster frame list or a project name list with only the poster frame of the selected project showing. In the latter view, you can change the sort order of the list by clicking the list header: project name or last modified date.
{% hint style="info" %}
The list of Live FX projects can become long; to quickly navigate the list you can just type the (first characters of the) name of a project -the project list will automatically scroll to that correct position and select the project.
{% endhint %}
Subsequently using the Quick Key: Enter is equivalent to clicking the **Enter Project** button.
To the right of the project list, the poster frame of the selected project is displayed. When no poster frame is available for the project a default placeholder is displayed. You can set a specific poster frame after entering the project. If you do not explicitly set a poster frame, Live FX will automatically select one the first time you enter and exit a new project.
Below the poster frame, Live FX displays the media path of the project. Each project has a media path. Note however that this does *not* mean that you cannot load media outside that path into the project. If the project does not have a valid media path or if the media path is inaccessible, Live FX will display that in yellow and you can not enter that project before the path has been set in the Project properties dialog or access to the path has been restored.
### **System Settings**
Open the System Settings panel with a wide variety of system settings. For more info, go here: [System Settings](/live-fx-documentation/getting-started/introduction/settings/system-settings.md)
### **User Settings**
Live FX allows you to create multiple user accounts, each with its own profile / specific settings. For more info, go here: [User Settings](/live-fx-documentation/getting-started/introduction/settings/user-settings.md)
### **Remote Sessions**
In a remote session, you link multiple Live FX systems together.
### **Exit**
Clicking the Exit button will close the program.
### **Log Files**
The Log Files button, located on the right side of the Menu Bar, allows quick access to the Live FX log files. Clicking on this button opens a file browser window to the location of the Live FX log files.
When engaging with ASSIMILATE's Technical Support or Licensing you might be requested for a log file of your system. This is a quick way to access these logs.
### **License**
Open the License dialog discussed in the previous chapter
### **Setup**
Open the first-time-started Setup panel to enhance the Live FX setup.
---
# Agent Instructions
This documentation is published with GitBook. GitBook is the documentation platform designed so that both humans and AI agents can read, navigate, and reason over technical content effectively. Learn more at gitbook.com.
## Querying This Documentation
If you need additional information that is not directly available in this page, you can query the documentation dynamically by asking a question.
Perform an HTTP GET request on the current page URL with the `ask` query parameter, and the optional `goal` query parameter:
```
GET https://assimilate.gitbook.io/live-fx-documentation/getting-started/first-time-start-up.md?ask=&goal=
```
`ask` is the immediate question: it should be specific, self-contained, and written in natural language.
`goal` is optional and describes the broader end goal you are ultimately trying to accomplish on behalf of the user. GitBook uses it to tailor the answer towards what is most useful for that goal.
The response will contain a direct answer to the question and relevant excerpts and sources from the documentation.
Use this mechanism when the answer is not explicitly present in the current page, you need clarification or additional context, or you want to retrieve related documentation sections.